Create, Invite & Edit Users
Notes:
- Permissions to edit users are limited to roles Admin & Planner.
- the following article refers to the creation of single users (one by one). Note that Teambook offers a feature to mass upload users via an import file, see instructions.
To create a user:
- In the Users section, click on Create user. A modal window will appear asking you to enter information.
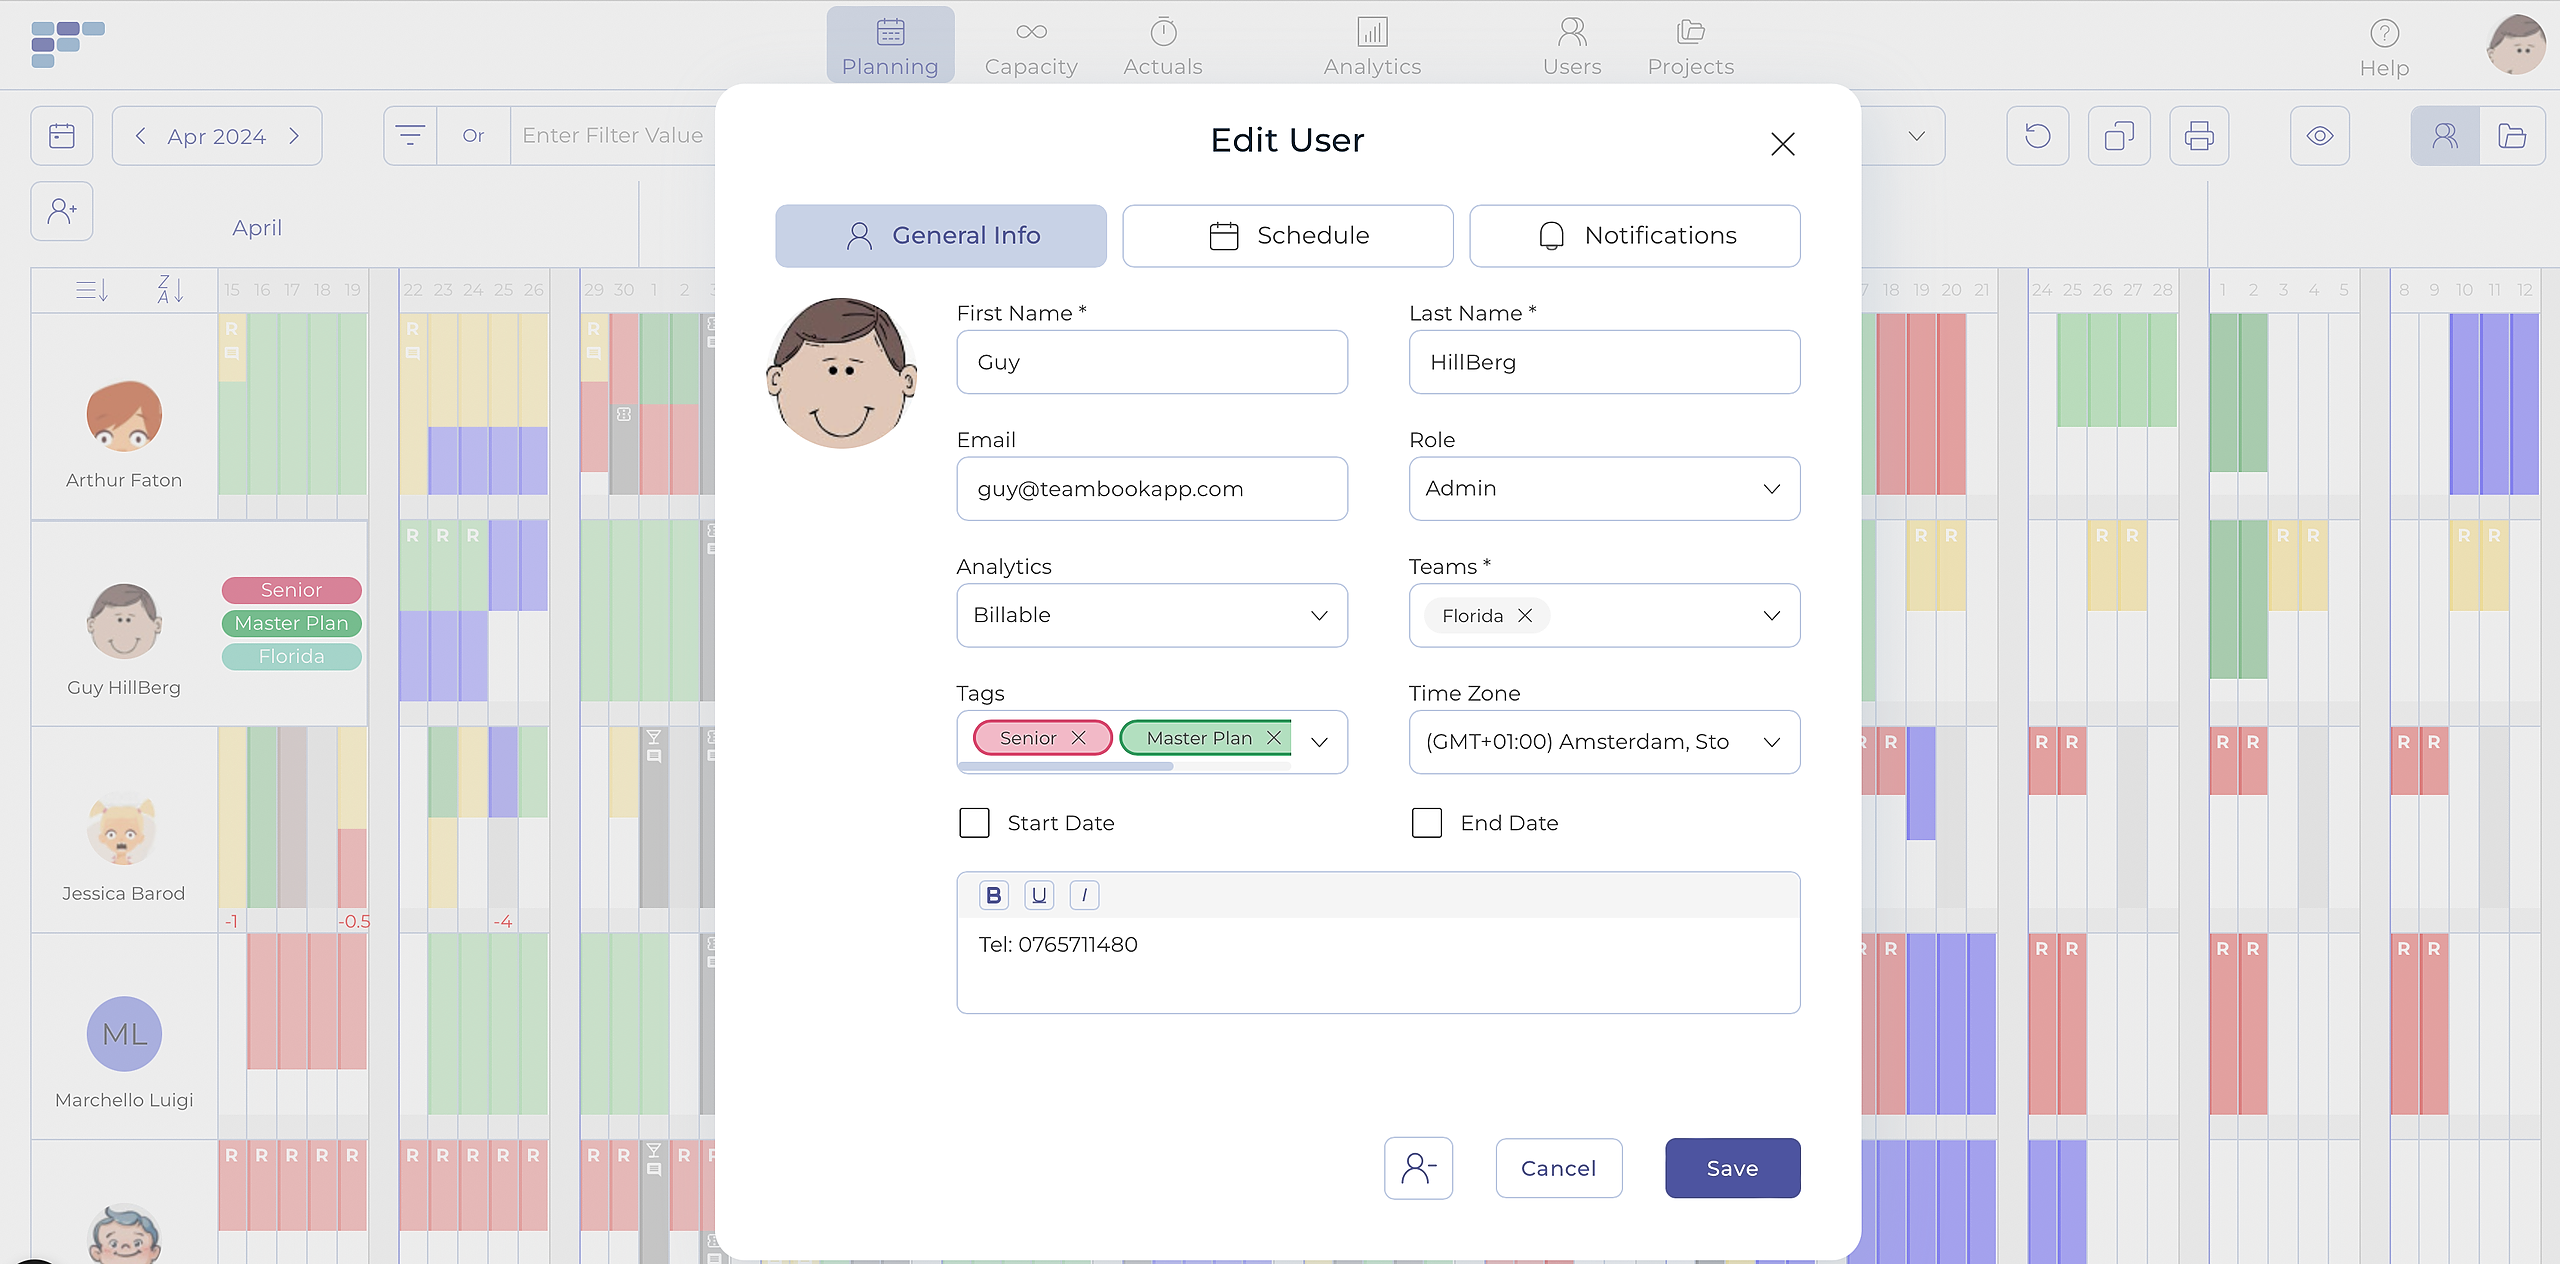
- Enter the new user's First and Last Name
- Optional: Enter the user's email address. An invitation email will be sent to this address and the user will carry an "invited" tag until s/he activates this invitation mail. Note: The email address must be unique for every user on the account.
- Choose the appropriate Time zone. If no time zone is selected, the default time zone defined by the account owner in the Organization settings will be used for the new user.
- Billable: by default, all users are set as "billable". Users that are not billable (e.g. sales people) should be set as non-billable so not not impact the Productivity and Utilization metrics.
- Choose the role.
- Optional: assign the applicable tags
- Optional: assign a department
- Optional: assign the additional team(s) to which the user is assigned (in case of single team, this one is automatically filled-up)
- Optional: define Start and/or End dates. The planner will show grayed-out cells for the period outside these dates.
- Optional: click on the Schedule tab to enter user-specific schedule
- Optional: click on the Notification tab to enter email notification
- Click Create

To invite a user:
Entering a valid email address in a newly created user will automatically trigger an invitation with instructions on how to log in to Teambook and create a password.
An Invited icon will appear to show that a user has received the invitation but has not yet accepted it.

If, for any reason, the invitation needs to be resent, you may do so using the appropriate icon on the user's master data page.

To edit a user:
Once created, you can edit users from the Users menu, following similar instructions as above.
Alternatively, we have made it easy to edit user directly from the Planning screen. To do so, simply click on the user you want to edit and then update any of the desired field before hitting the Save button!