Create and Edit Projects
Planners and Administrators can create, import, edit and archive projects.
Note: The following article refers to the creation of individual projects (one at a time). Alternatively, you can import projects - a very useful way to create many projects in one go!

- Go to the Projects section
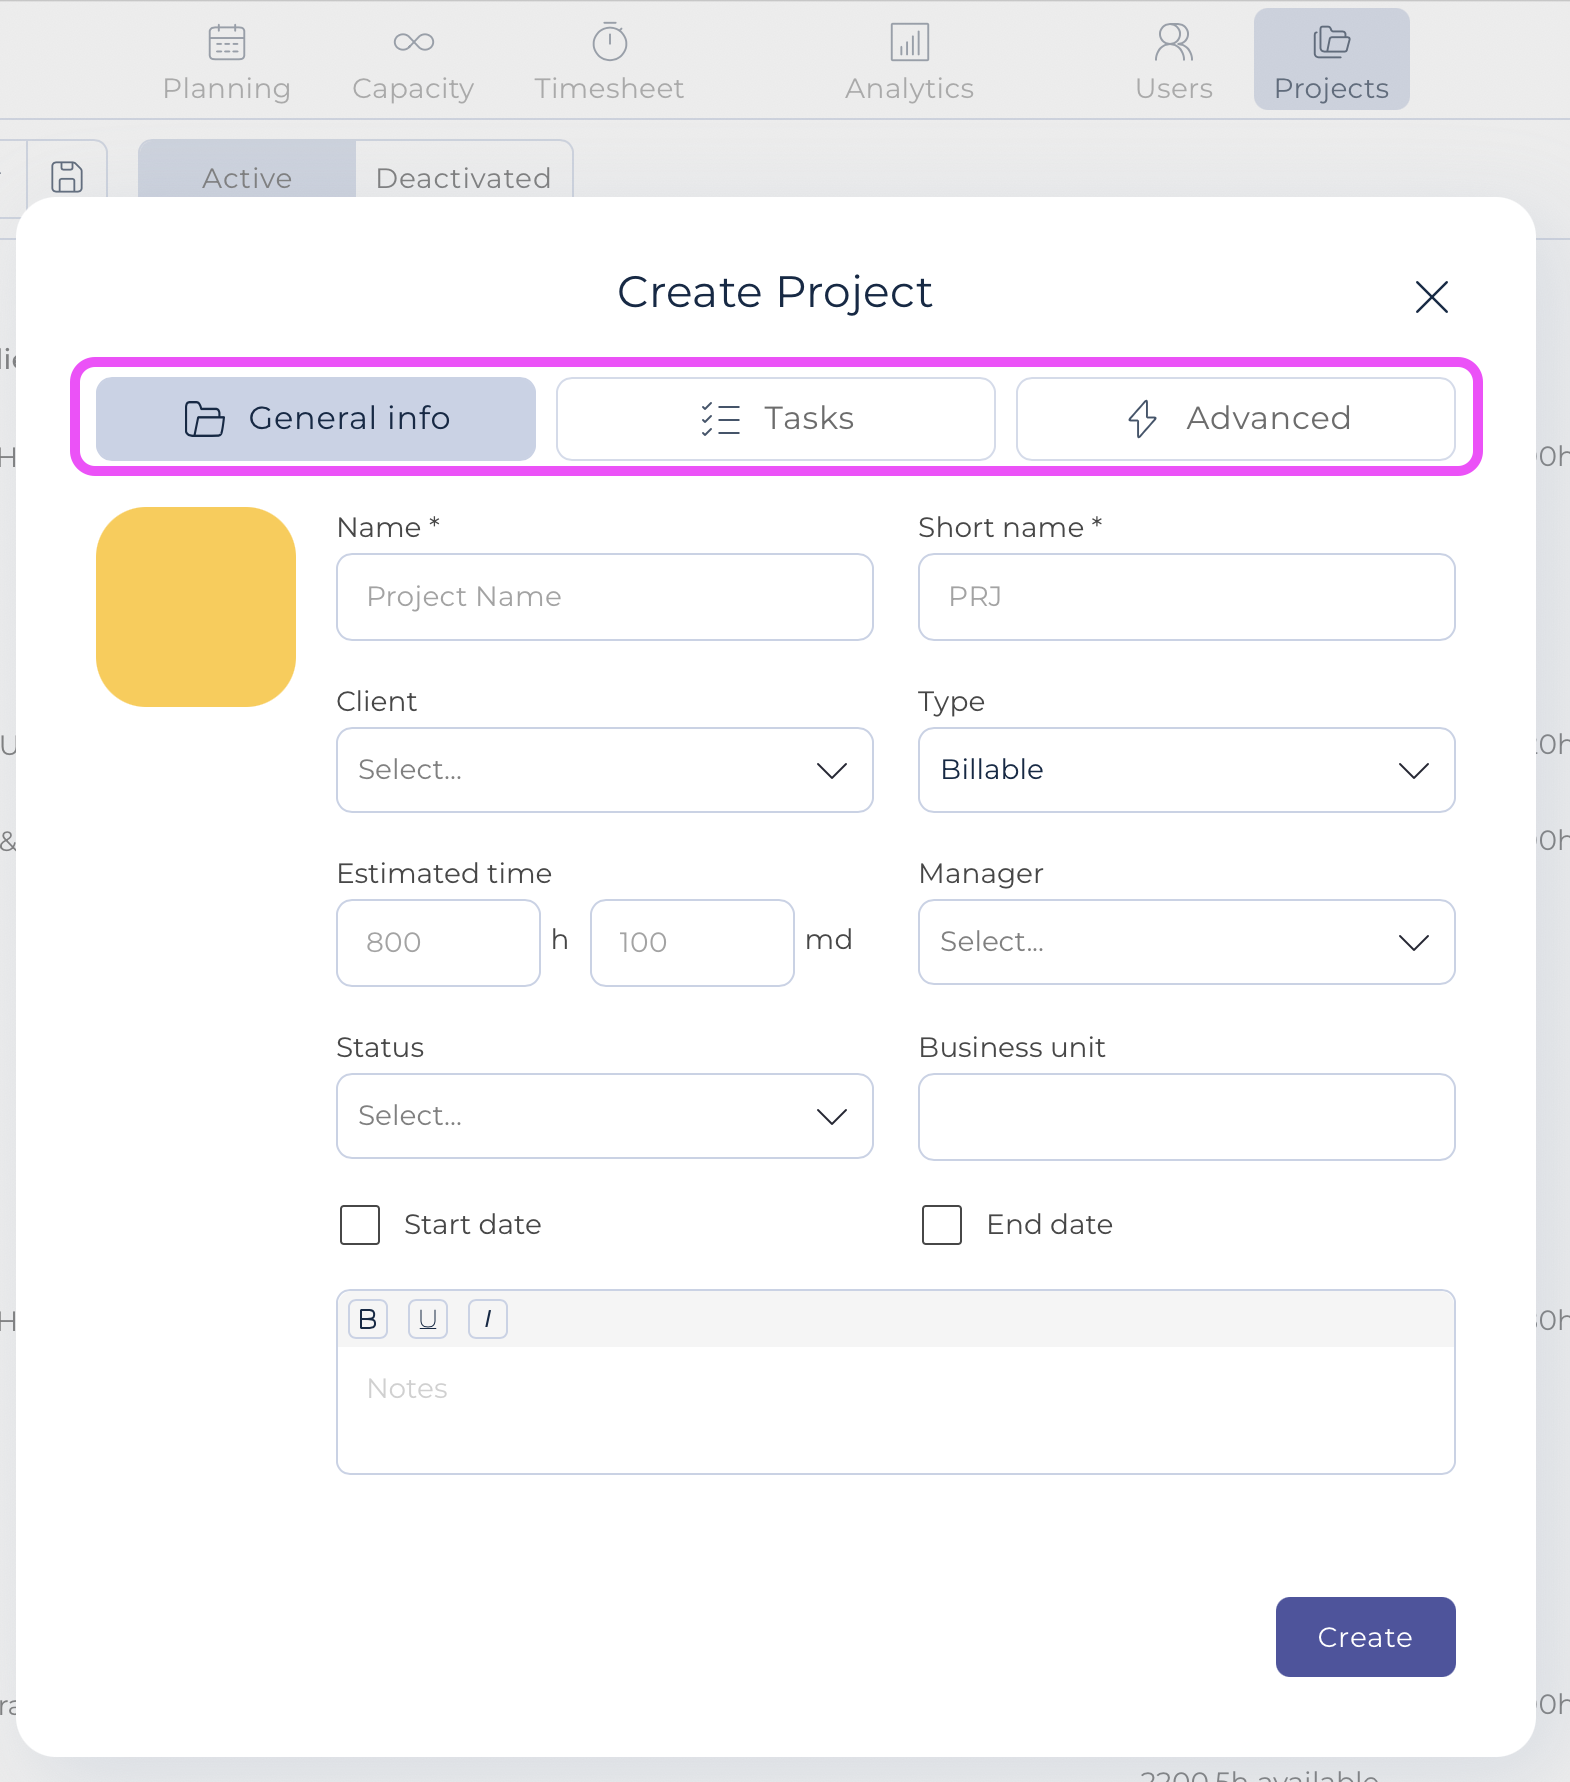
- Click on Create Project (Note: to "Create time off", refer to Project type)
- Enter the project name and a code (short name) to identify the project
- Optional: Change the Project color by clicking on the colored shape. This color is displayed in all the Teambook screens in order to easily distinguish projects
- Select the Project type; this information will be used to calculate the different KPIs
- Optional data on the General info window:
- Select the Client associated with the project using the drop down menu
- If you have a Time budget, enter it (in hours OR in man days; the system will automatically calculated the other value based on your company schedule). This information will be used to track the project budget vs the booked hours vs the actual logged hours and even against capacity data.
- Enter a Start date and/or End date of the project (these will show as milestones on the planner)
- Enter a Manager
- Enter a Status
- Enter a Business unit
- Enter Project Notes
- Optional data on the Tasks tab
- this tab allows you to enter /edit Project specific tasks; it also list the tasks defined at organisation level
- Optional data on the Advanced tab
- Email notifications: bookings entered on this given project may be sent to the project manager of the project
- Custom fields
- Project constraints: you may limit the number of users planned on any given day and/or some period of time when the project is NOT available for bookings
- Click Create. Your project is now listed in Projects
To edit a project:
- Click on the project from the project list
- Edit the fields as needed and Save
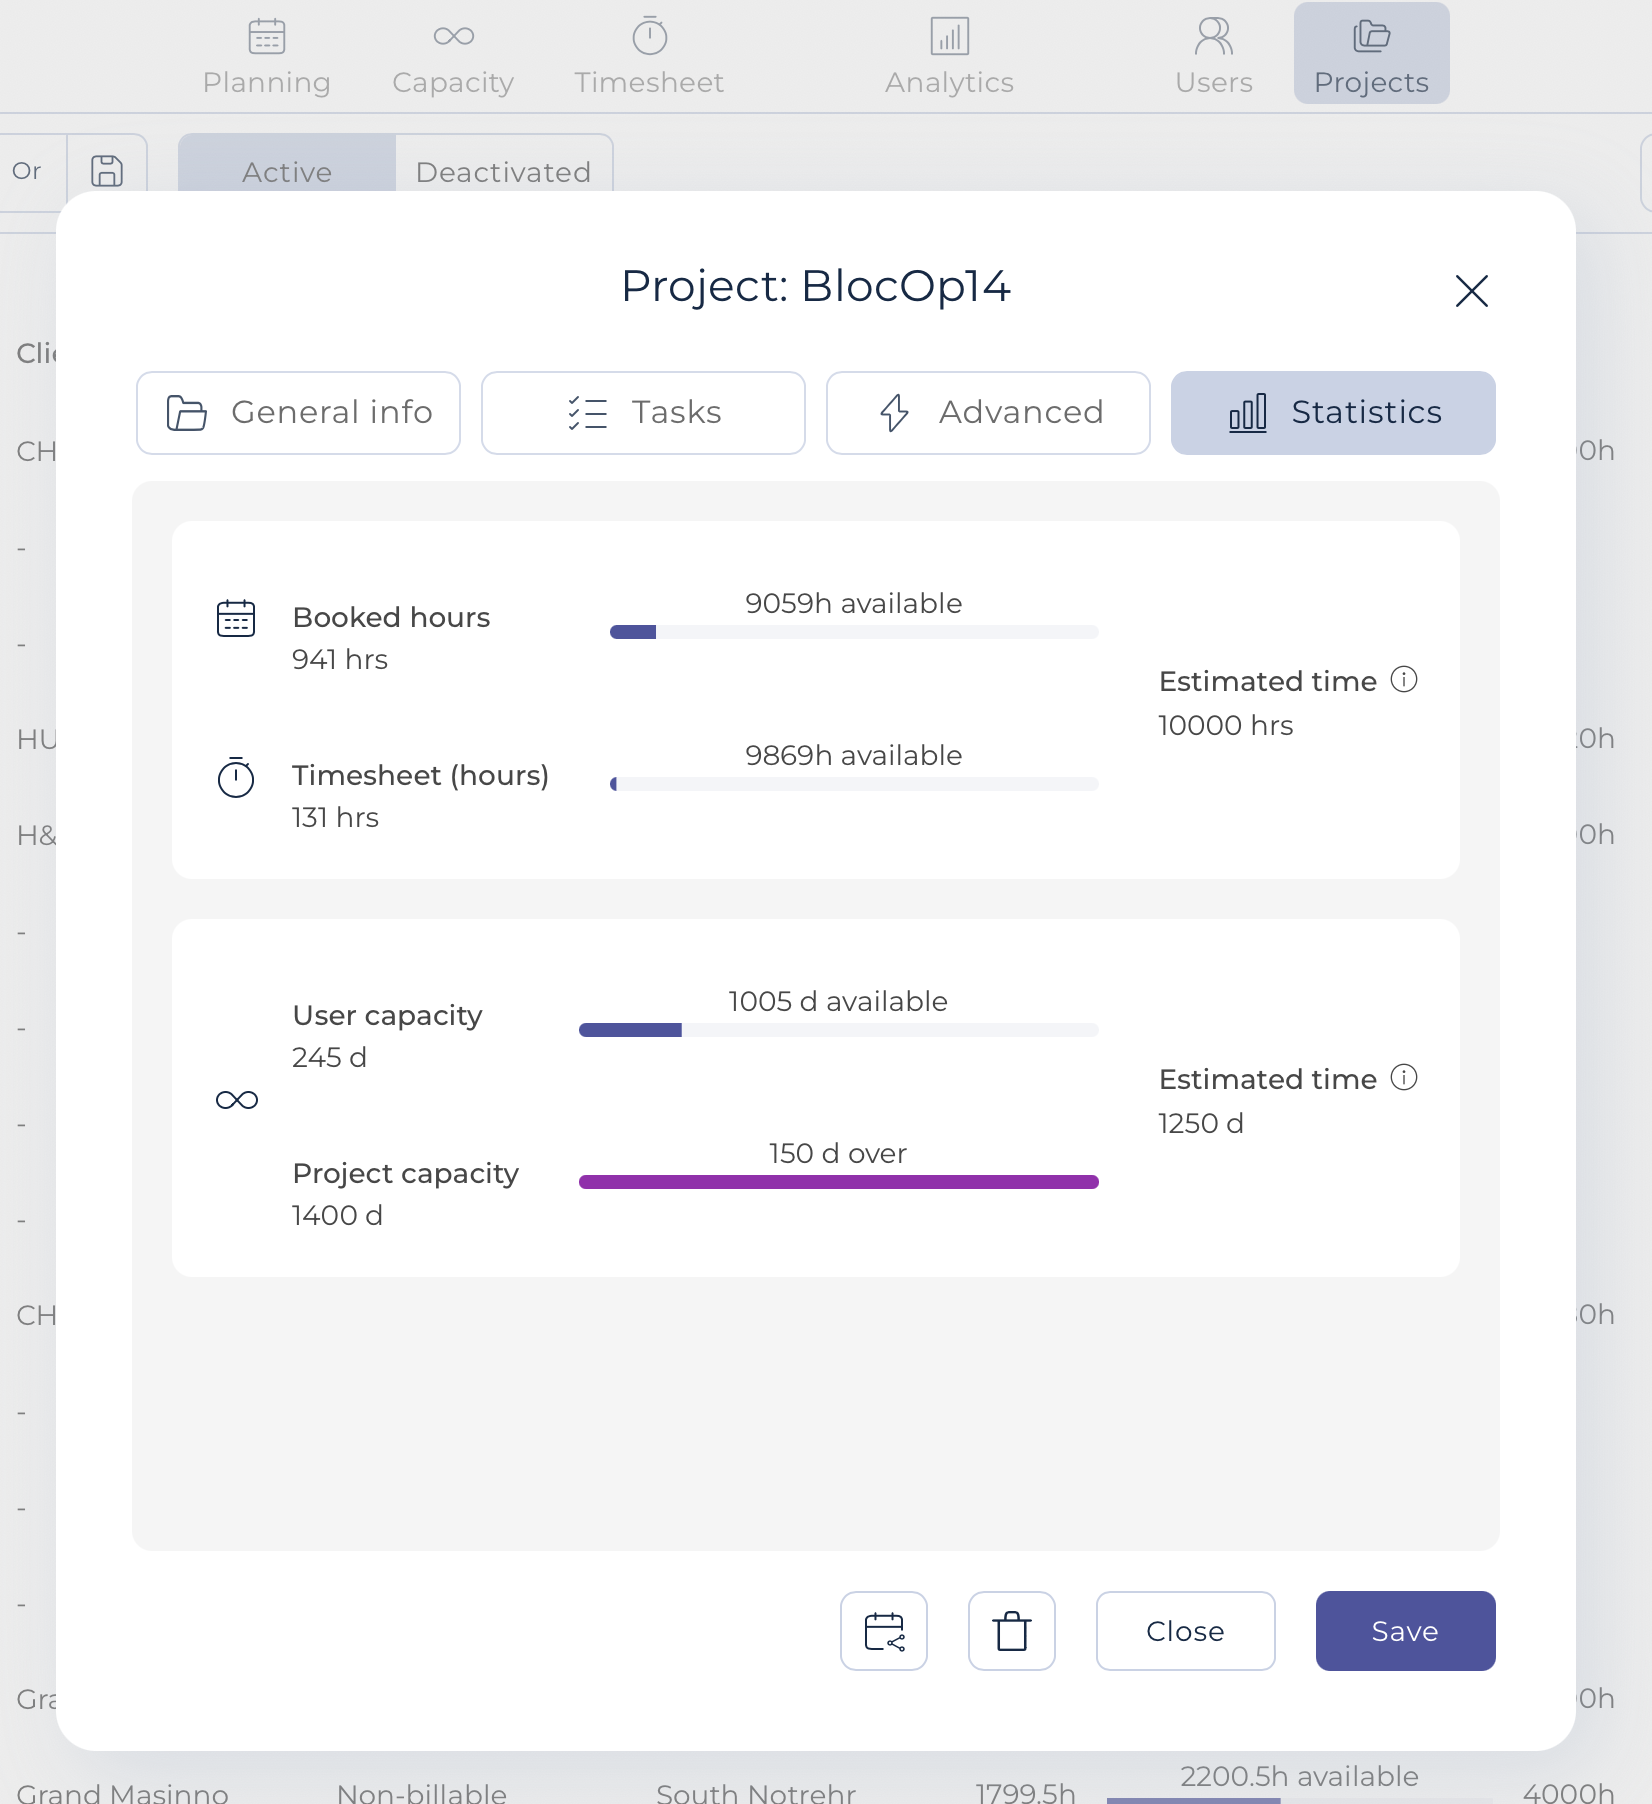
Note the tab Statistics is only for display purpose only. It captures the different time information about the project: booked, logged or capacity and compares with the time estimated entered in the general tab.