Using the button on the top right corner of the Planning screen, you can switch to the Grouped View, which groups your bookings by project, presenting all users booked on this given project.

This view allows you to visualize the users planned on a given project at a glance.
As in the traditional User view, you can access the same icons and settings to navigate around and facilitate the booking entries as well as switch the Team you would like to view & plan (remembering that the bookings greyed out belong to another team - or project, see above example).
Note that the visual settings ("eye icon") offers a dedicated option to visualize the client and to group the projects accordingly:

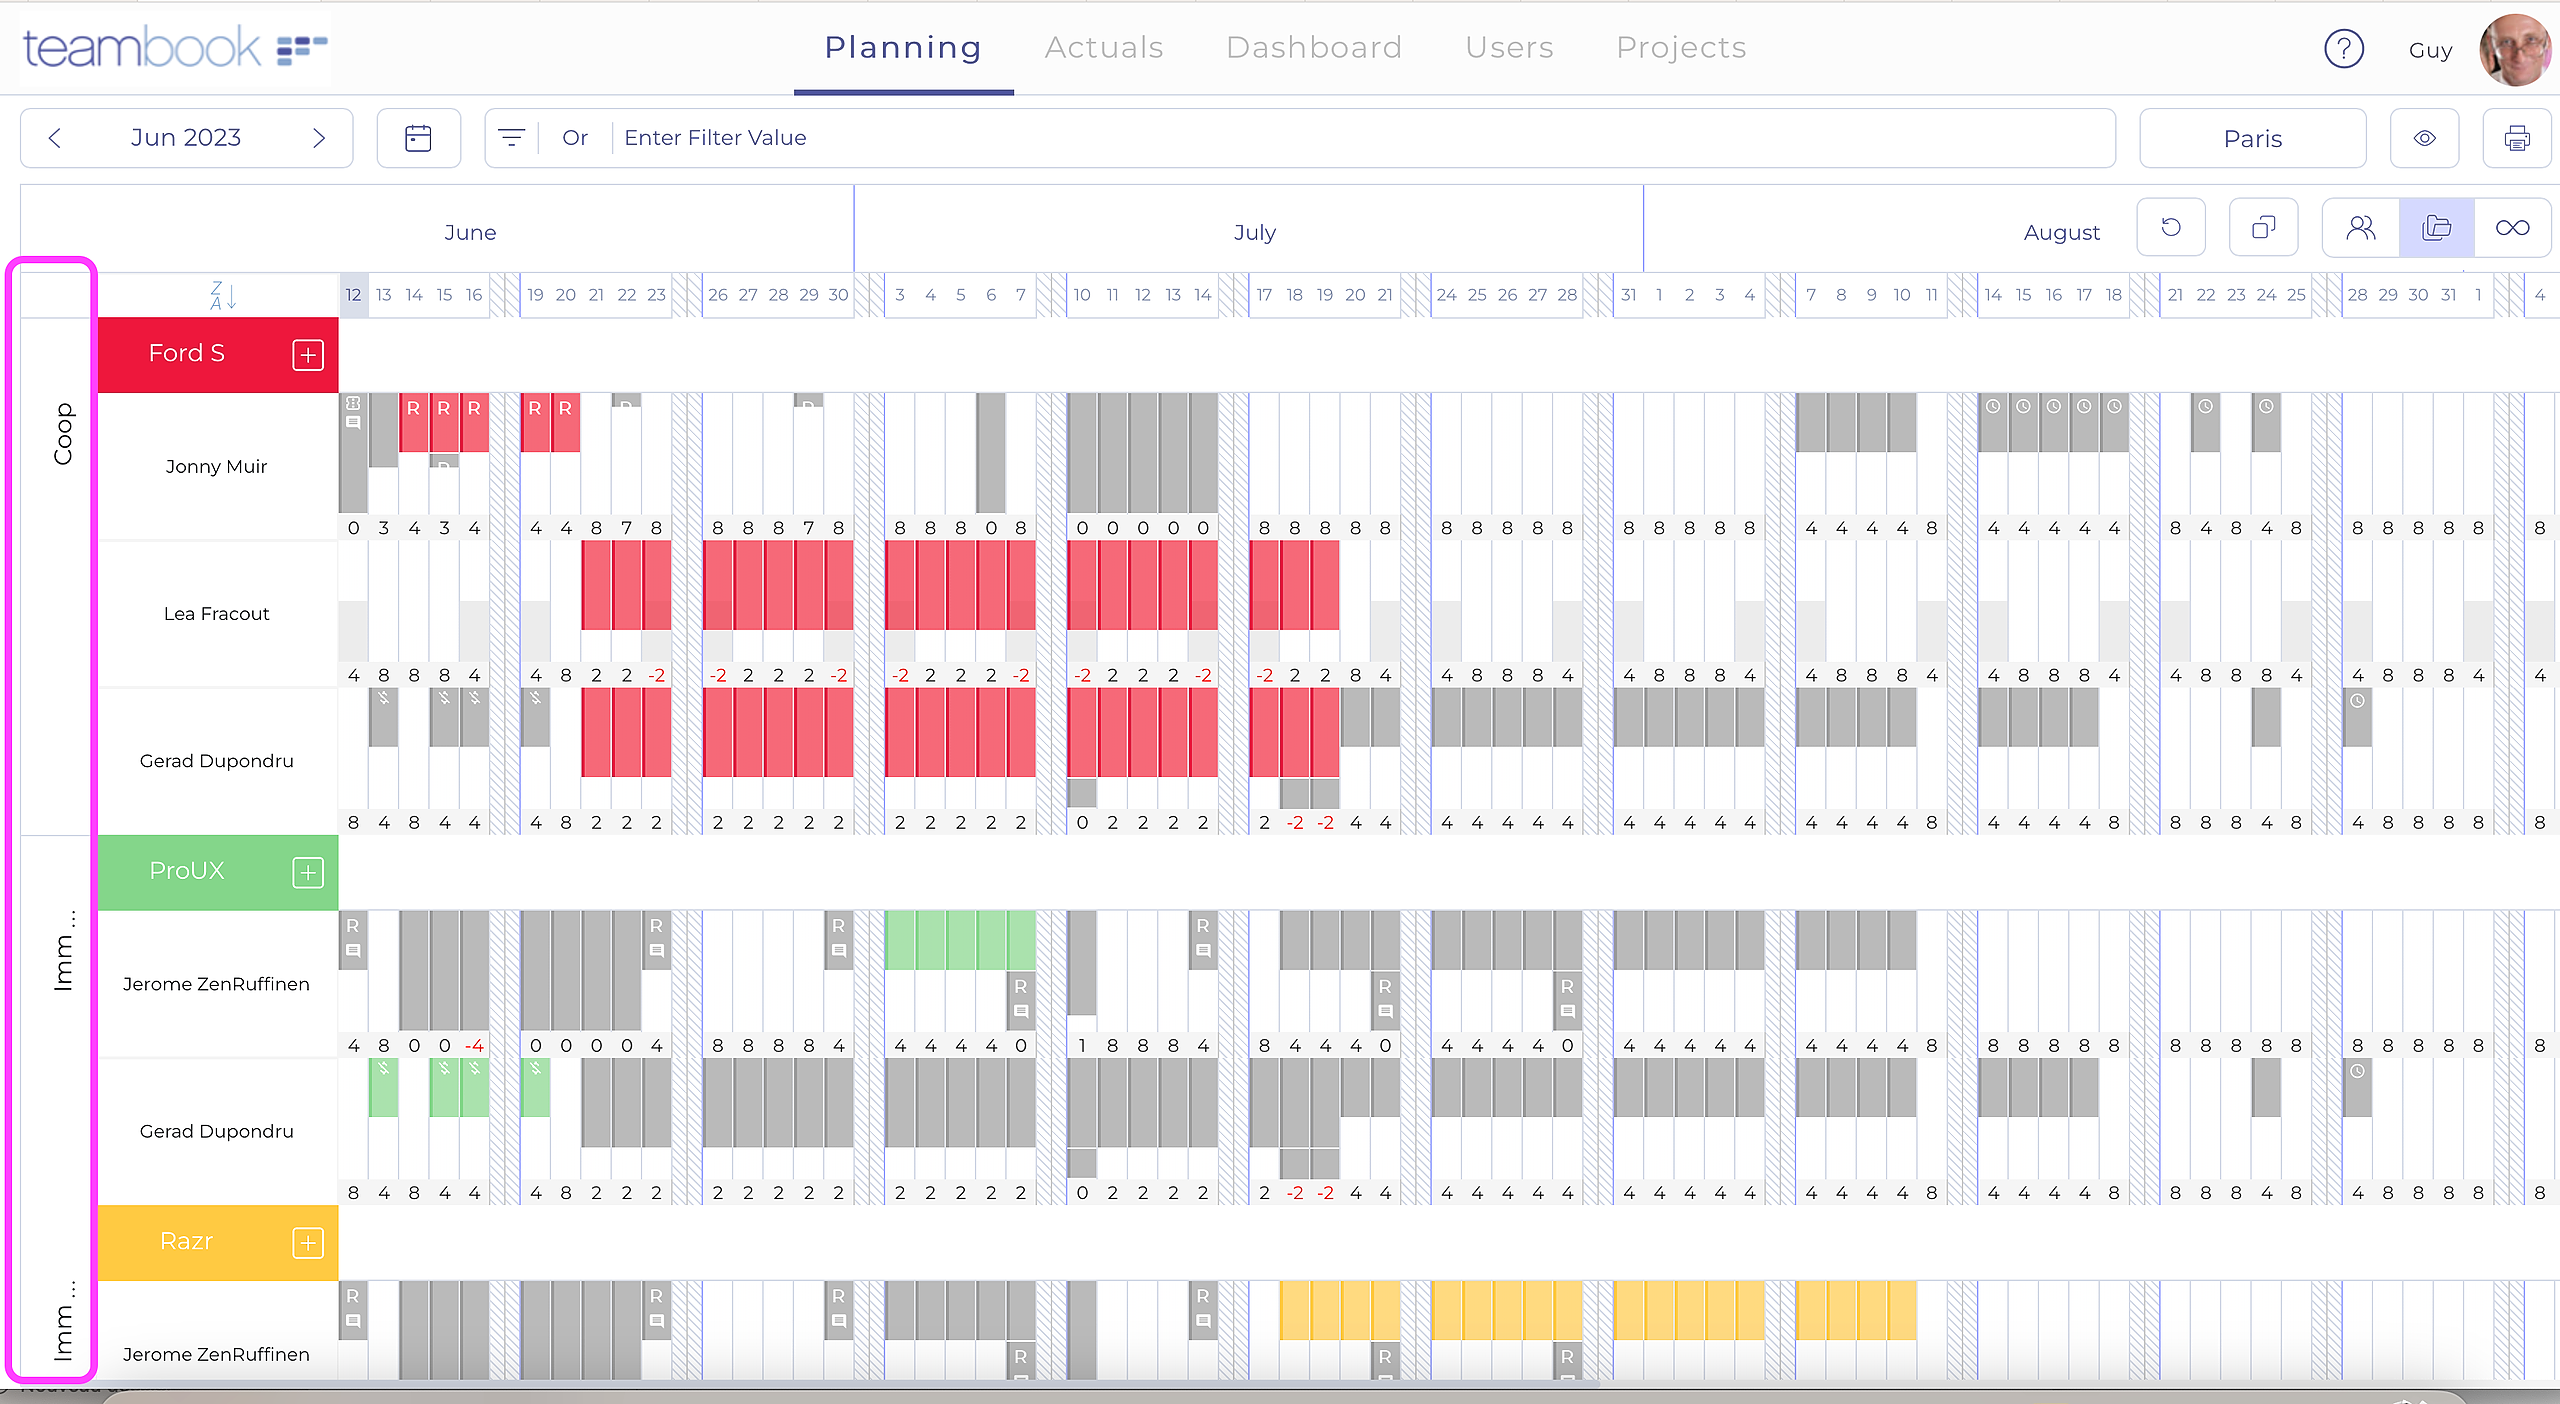
It is possible to plan all your resources from this view as you would do from User View.
An important addition to this view are the Project Milestone, represented by colored horizontal bars in front of each project.

Such milestones can be used to document the critical phases or moments of a project and potentially facilitate the planning of the resources needed to reach them! You may enter two overlapping milestones as showed above.
When start/end dates are entered in a project, these will automatically be set up as "one day" milestones, with a tool tip indicating so; the use of milestones is otherwise optional.
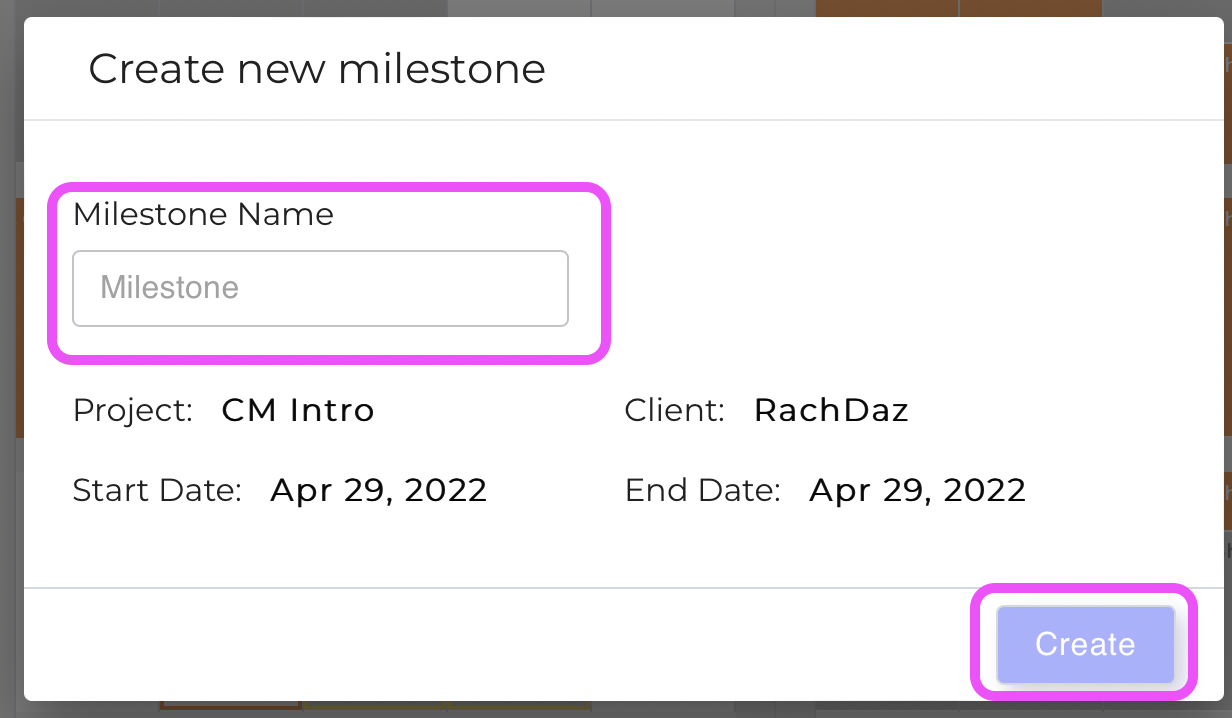
You may create a Milestone simply by clicking on the line in front of the project and then dragging until the potential Milestone end-date OR manually choosing the specific dates on the date picker. Enter a Name and hit the Create button.
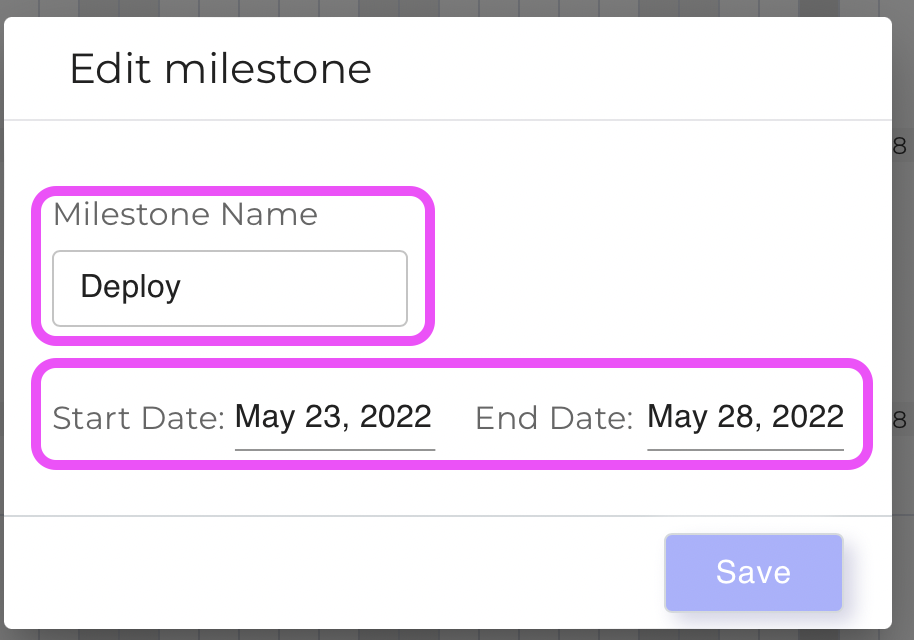
To edit a Milestone's duration, you may simply position your mouse on its borders and drag as desired; alternatively, click on it and the amend its date and/or name on the appearing pop-up before hitting Save: